
Okay, so I actually completed this German Schmear fireplace update back in November of 2020, but because of life with two kids three and under, and a day job, I am just getting around to sharing this project now! I love seeing before and afters, so I thought even though this DIY project is not new, I should still share it in case you are looking to update a similar stone fireplace of your own. My goal with this project was to brighten up our fireplace without doing a complete whitewash because I do love the rustic stone. I decided that a German Schmear with white grout would be my best bet. Keep reading to see the before and after and to read how I did it, and how I will do things differently on our other stone fireplace.
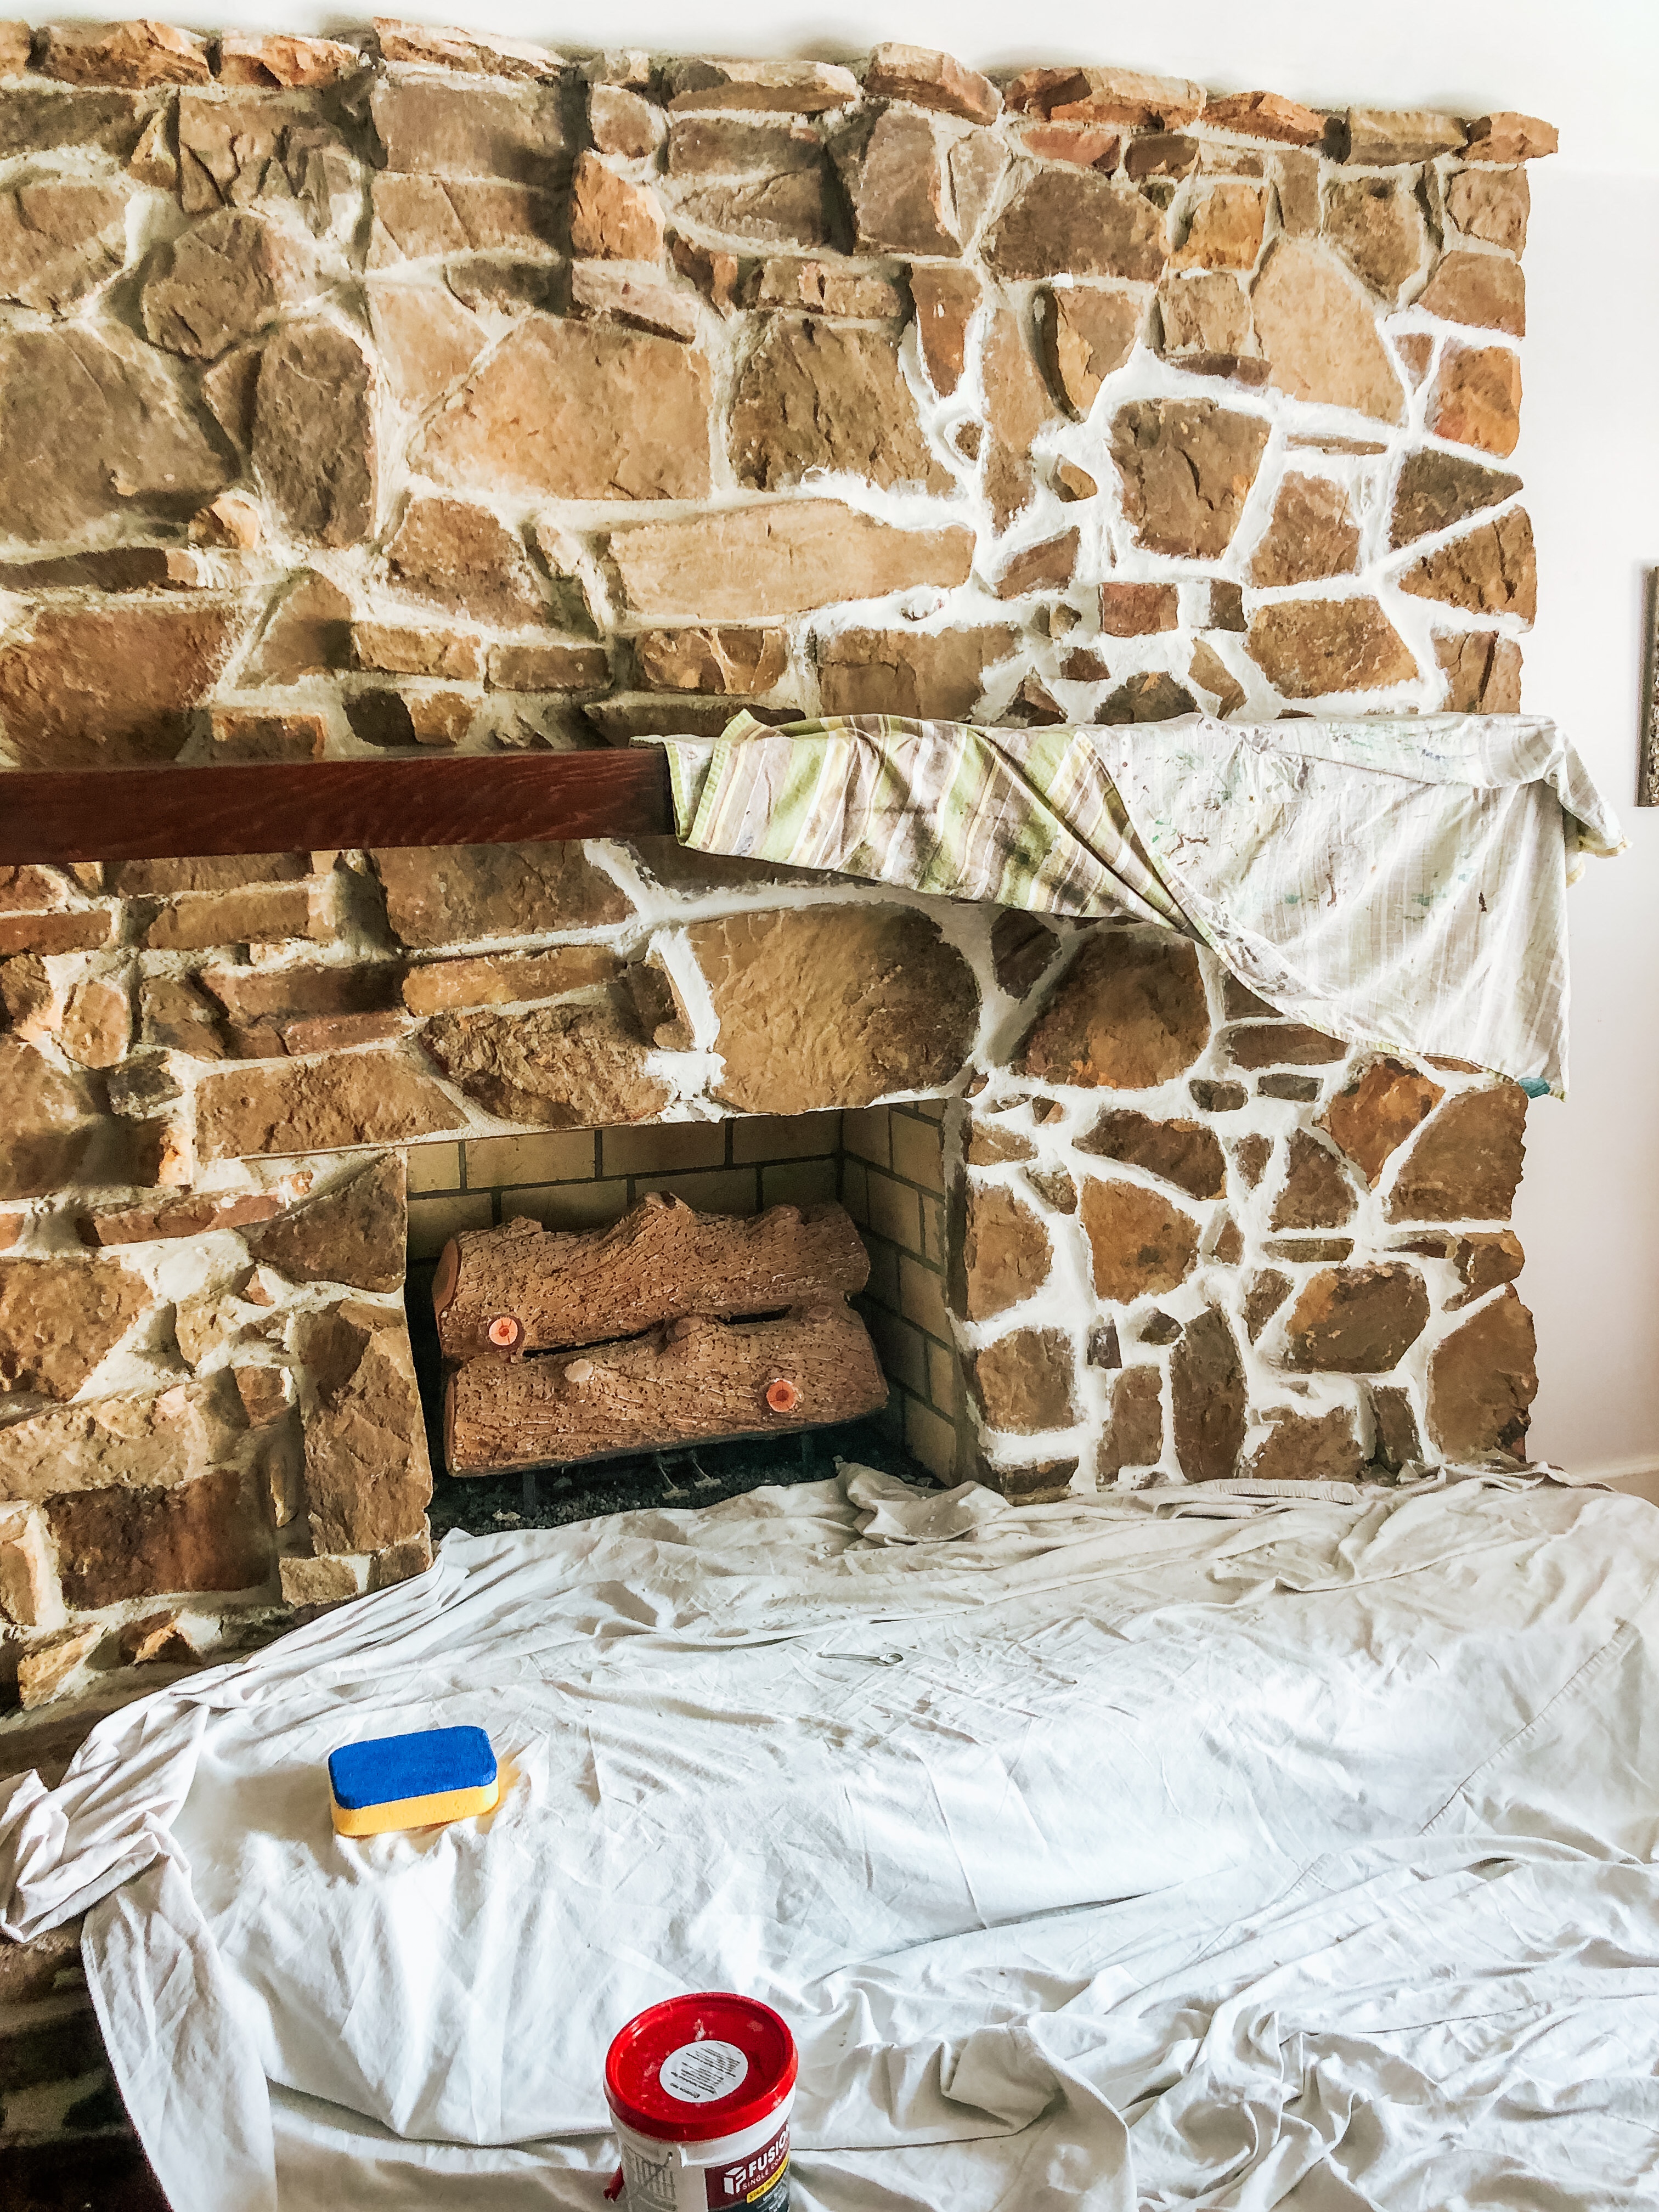
If you follow me @ShipsHQ on Instagram, you may have already seen the finished product, but like I mentioned earlier, I think its worth it to share the before and after so you can see the difference side by side. Like most people, 2020 had me a little stir crazy so I decided to update our living room’s stone fireplace with a German Schmear. Since the fireplace in our living room is the smallest out of two, I thought it would be a great place to start. I decided the fireplace needed an update because there were some cracks in the existing masonry and some paint drops from when we had our ceilings de-popcorned. I also felt that despite having a lot of windows (and white walls), the living room still seemed dark, and I decided that the fireplace was the culprit.
While I wanted to lighten things however, I did not want to paint the stone completely or give it a white wash because the rustic, stone fireplace was one of the things Will and I fell in love with when we purchased our house. Here is how I took our fireplace from a “log cabin” to an “English Cottage” vibe:
-
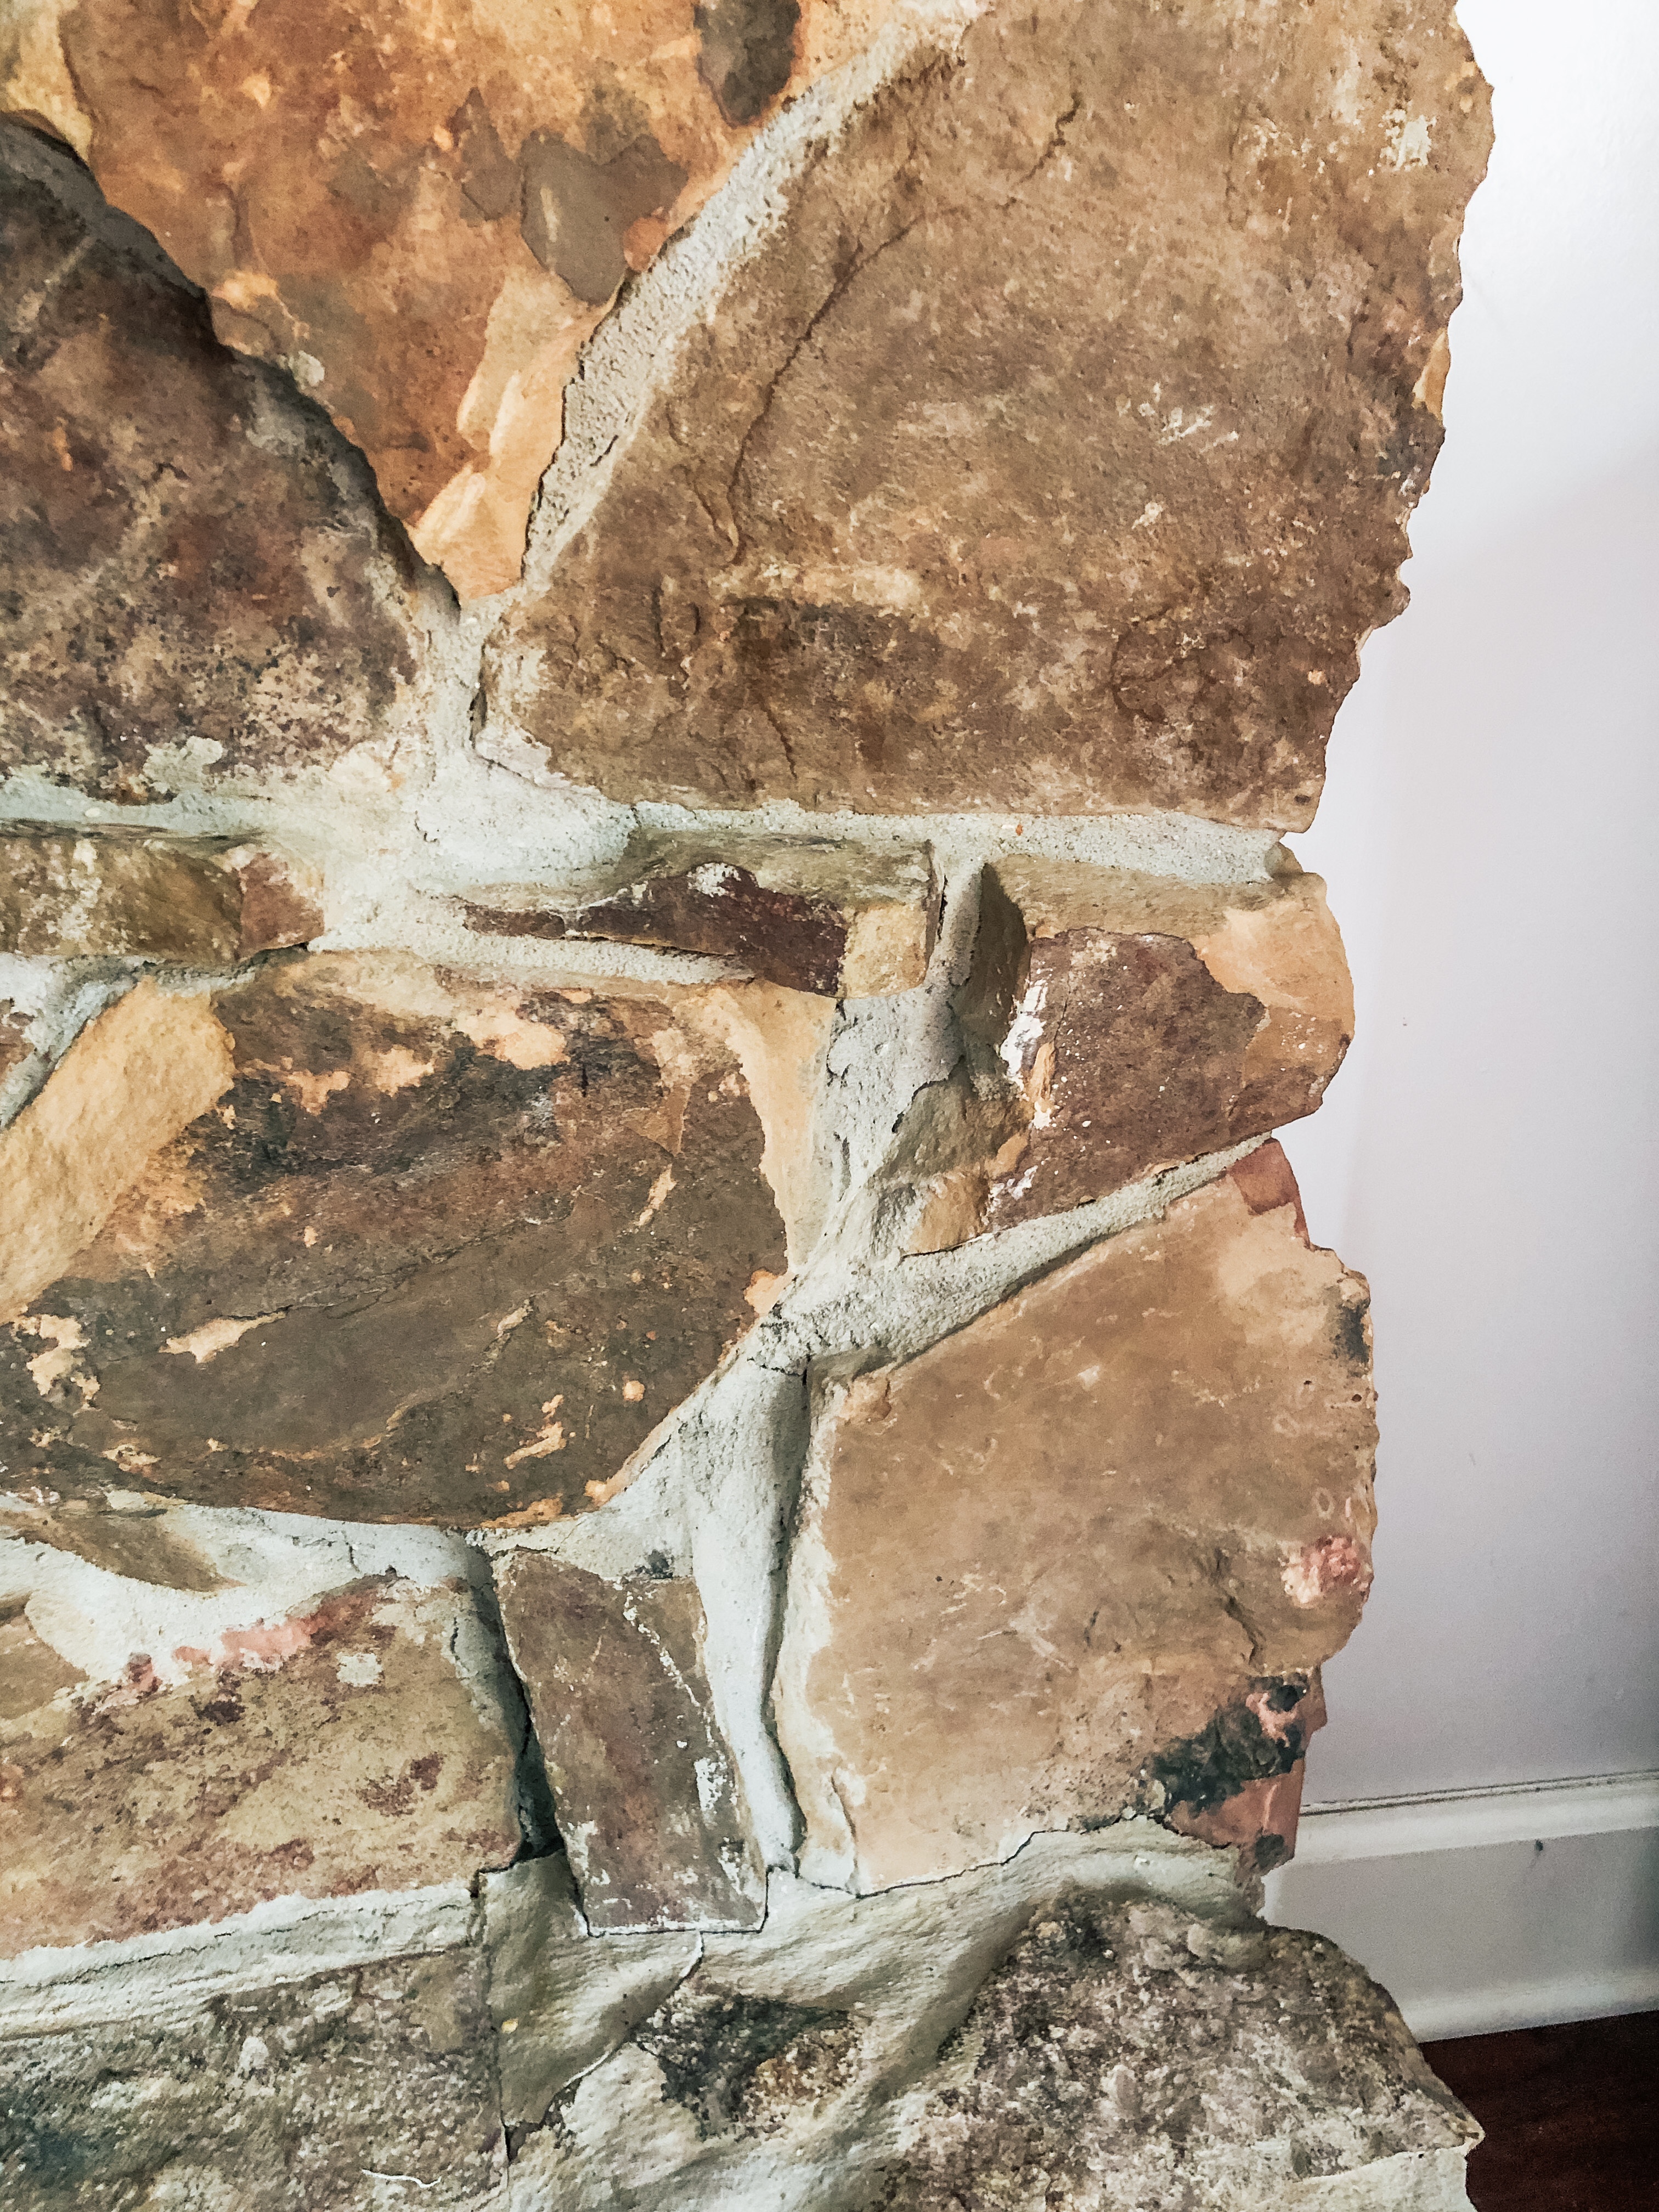
Cracks in Masonry -
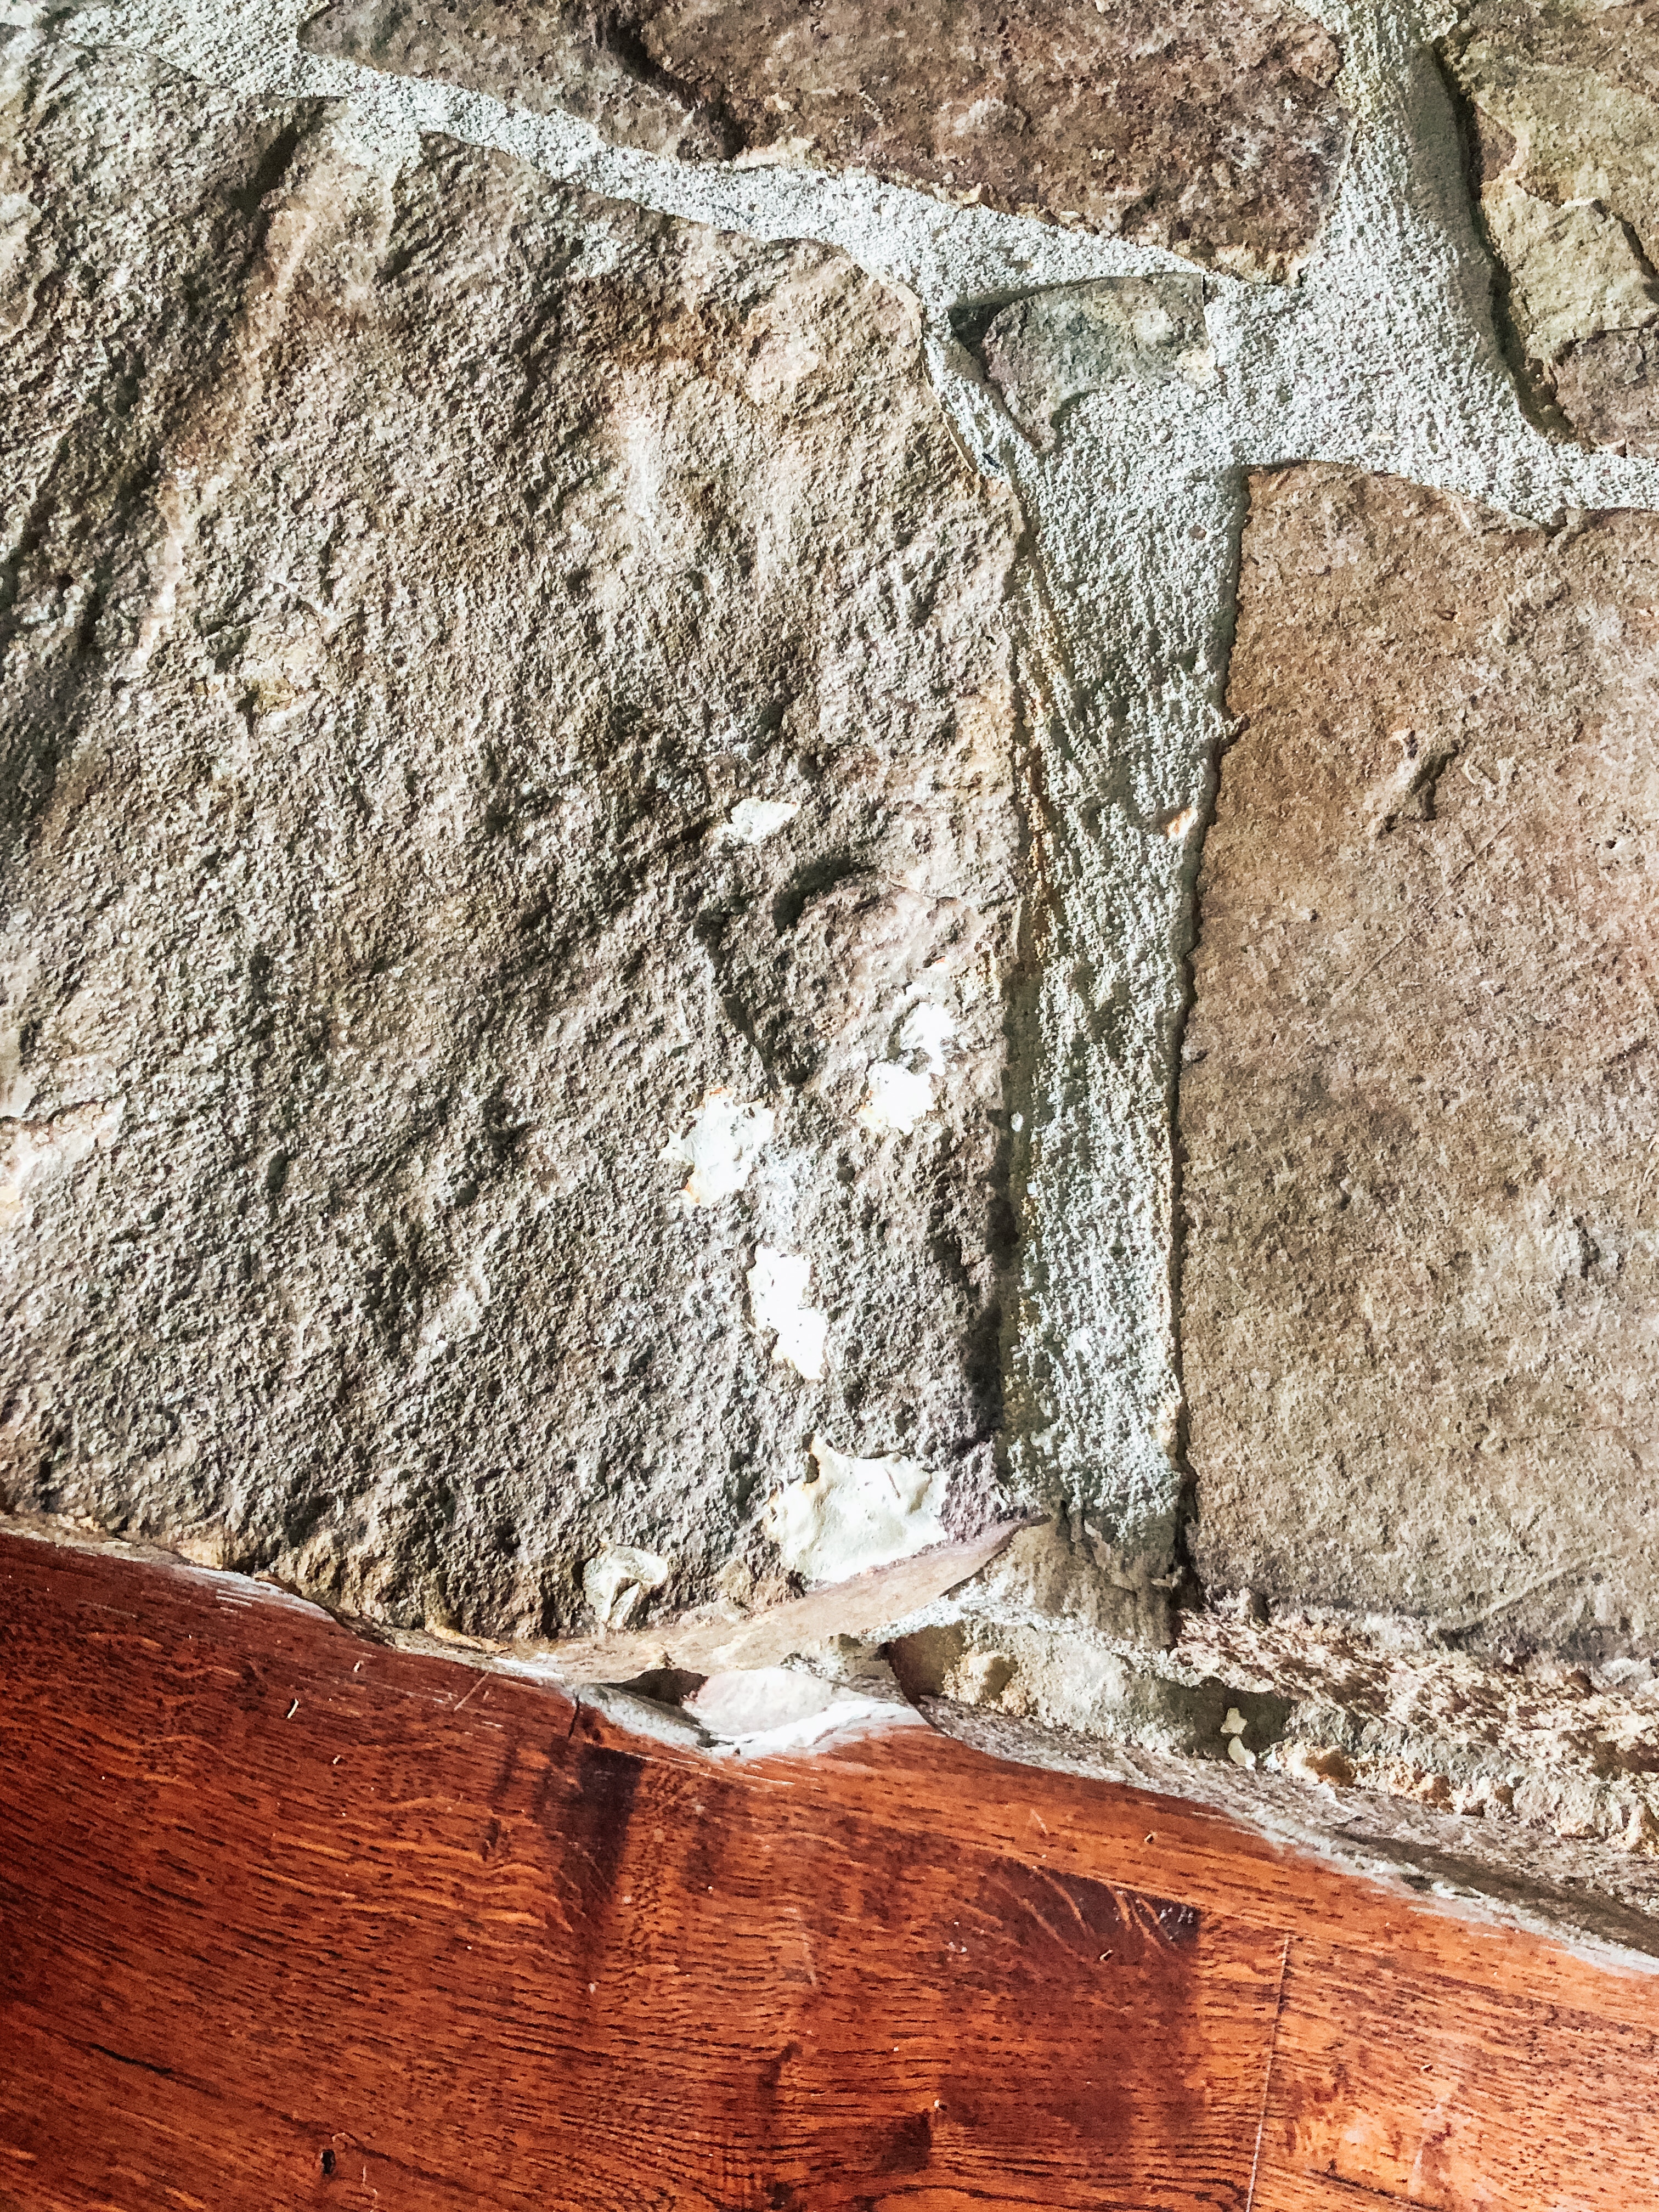
Paint Spots I Wanted to Cover
Disclaimer: If you make a purchase from a link provided in this post, I may earn a small commission from your purchase. Ship’s HQ appreciates your support and thanks you!
FROM LOG CABIN TO ENGLISH COTTAGE WITH A GERMAN SCHMEAR
Keep reading to see what I did and how this project turned out. Be sure to leave me a comment to let me know what you think!
TOOLS | WHAT YOU NEED FOR THIS PROJECT
After doing plenty of research on youTube and Pinterest I had to decide between a couple different ways to do this project. You can either use pre-mixed grout, or mix your own. Since our fireplace seemed small, I thought I’d go with the easier route and buy the pre-mixed grout.
While buying pre-mixed grout was easier and required less tools, this route ended up costing more in the long run because some of the grooves in the natural stone fireplace were so deep, I ended up using A LOT of grout (about three gallons worth).
If you have just a regular brick fireplace, I would totally use pre-mixed grout for this project because there is less depth in your grout lines. If you have a stone fireplace however, It would be more cost-effective to buy the extra tools to mix your own grout.
WHAT I USED
- Pre-Mixed Grout (This is the one I used)
- 2″ Scraper
- Grout Bag
- Drop Cloth
- Bucket
- Sponge
- 40 Grit Sandpaper
I chose to use a 2″ scraper because I felt that the smaller scraper would be more precise when smoothing out the grout. The natural stone has a lot of angles, and I felt that the smaller scraper was easier to use to get in all the grooves and behind the mantle.
[show_shopthepost_widget id=”4481198″]
HOW TO | THE GERMAN SCHMEAR TECHNIQUE
I wish I could have provided a video of me doing this, but with a baby and just mom-life in general, I worked on this project about an hour at a time in between naps and whenever I could find a little break from watever else the days had in store. If I could have dedicated my full attention to this project, I definitely could have completed it in a weekend, but instead it took me three months! At least I had it done just in time to put up the Christmas decorations in our house…
Can’t forget to mention before you start everything, be sure to protect your mantle and floors by laying down drop cloths. This project can get a little messy and the drop cloths help make for an easy clean up.
HOW TO
It is pretty simple to do the German Schmear technique. Basically you are just re-grouting over the existing grout, but instead of just keeping the grout neatly in the grout lines, you scrape a little of it over the existing stone or brick as well. I found it best to work in small sections no bigger than about a square foot at a time. When smoothing out the grout, I smoothed it in the direction that felt most natural based on the size and shape of the stone. I also filled up the grout lines so that they were even with the lowest stone the grout touched, and smoothed the grout over the lowest stone which (seemed like the most natural direction to go). After smoothing the grout with the scraper, go over it again with your wet sponge so the grout looks smooth. Once all the grout is dry, smooth the grout even more with a 40 grit sandpaper.
- . Pipe in your grout about a square foot at a time.
- Take your scraper and smooth out the grout going with “the grain”/natural flow of the stone.
- Make the grout about even with the stones and smooth a little grout over the edges of the stone.
- Smooth out the grout with a sponge and let dry.
- Once dry, smooth over with 40 grit sandpaper.
After I was done with this project, I felt like I could have covered up the stone a little more with the white grout, but for Will’s sake I stayed more on the conservative side by just slightly covering the stone.
-

Pipe in Grout -
Smooth with Scraper, then Wipe with Soft Cloth/Sponge

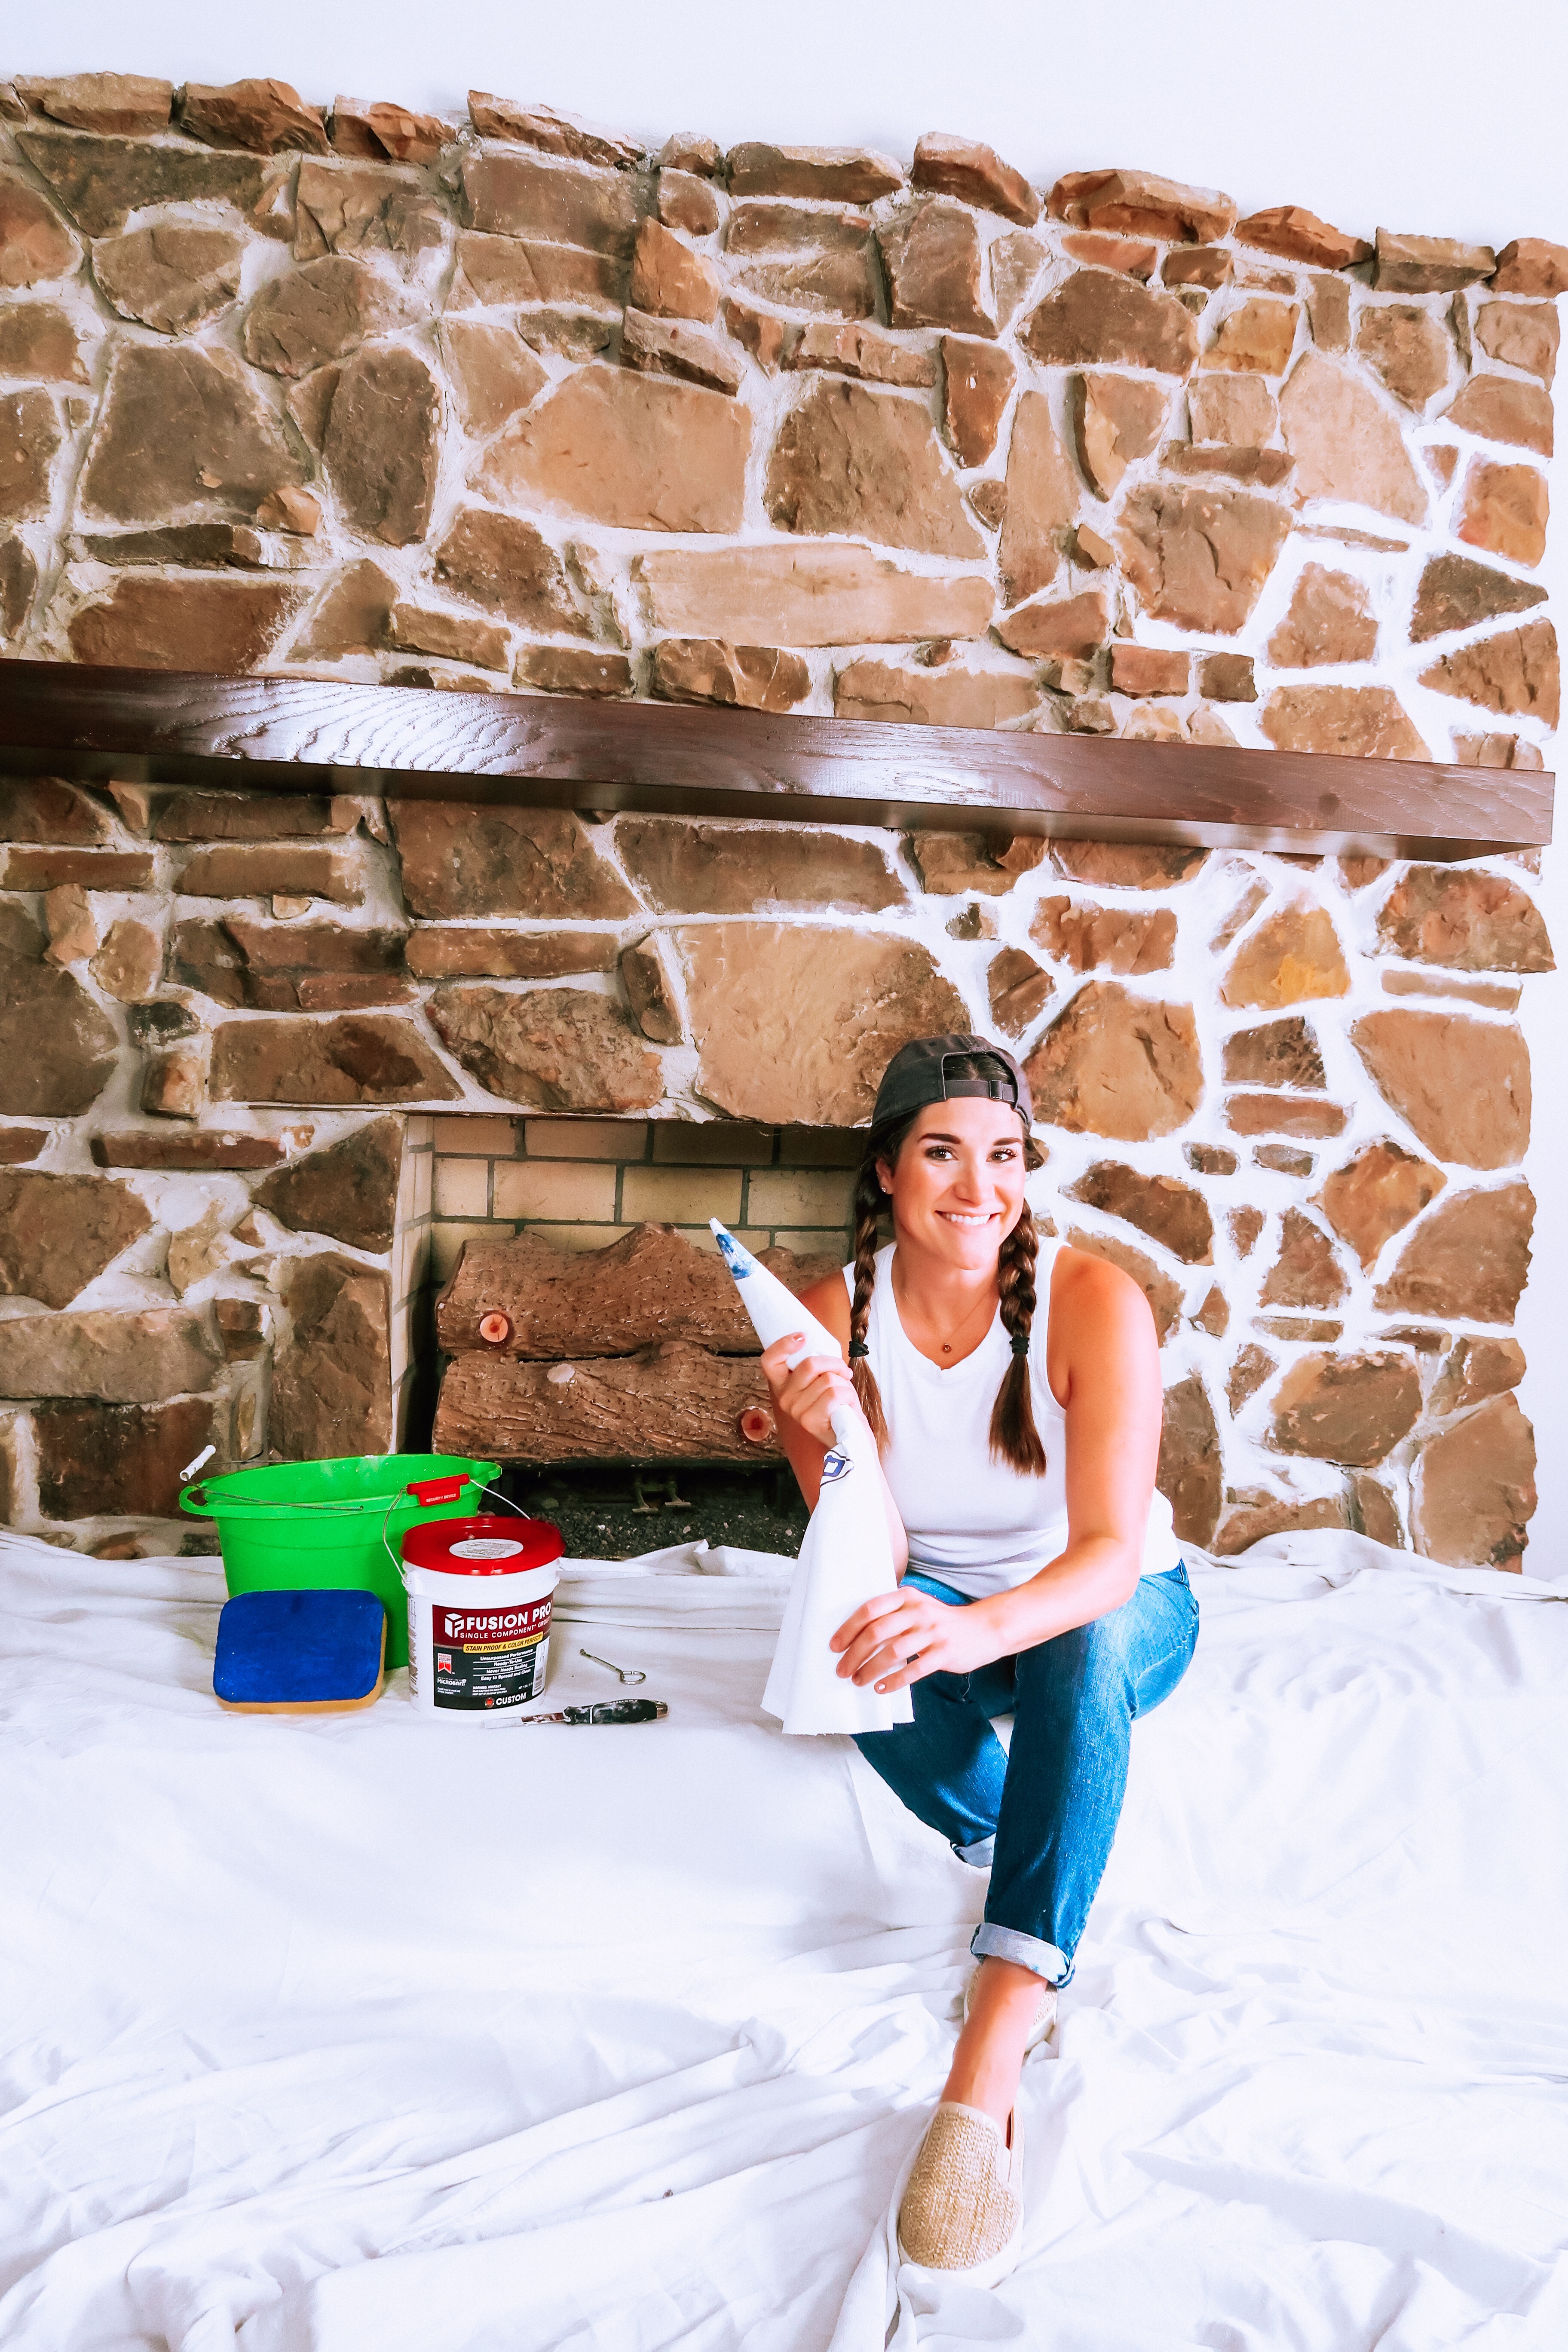
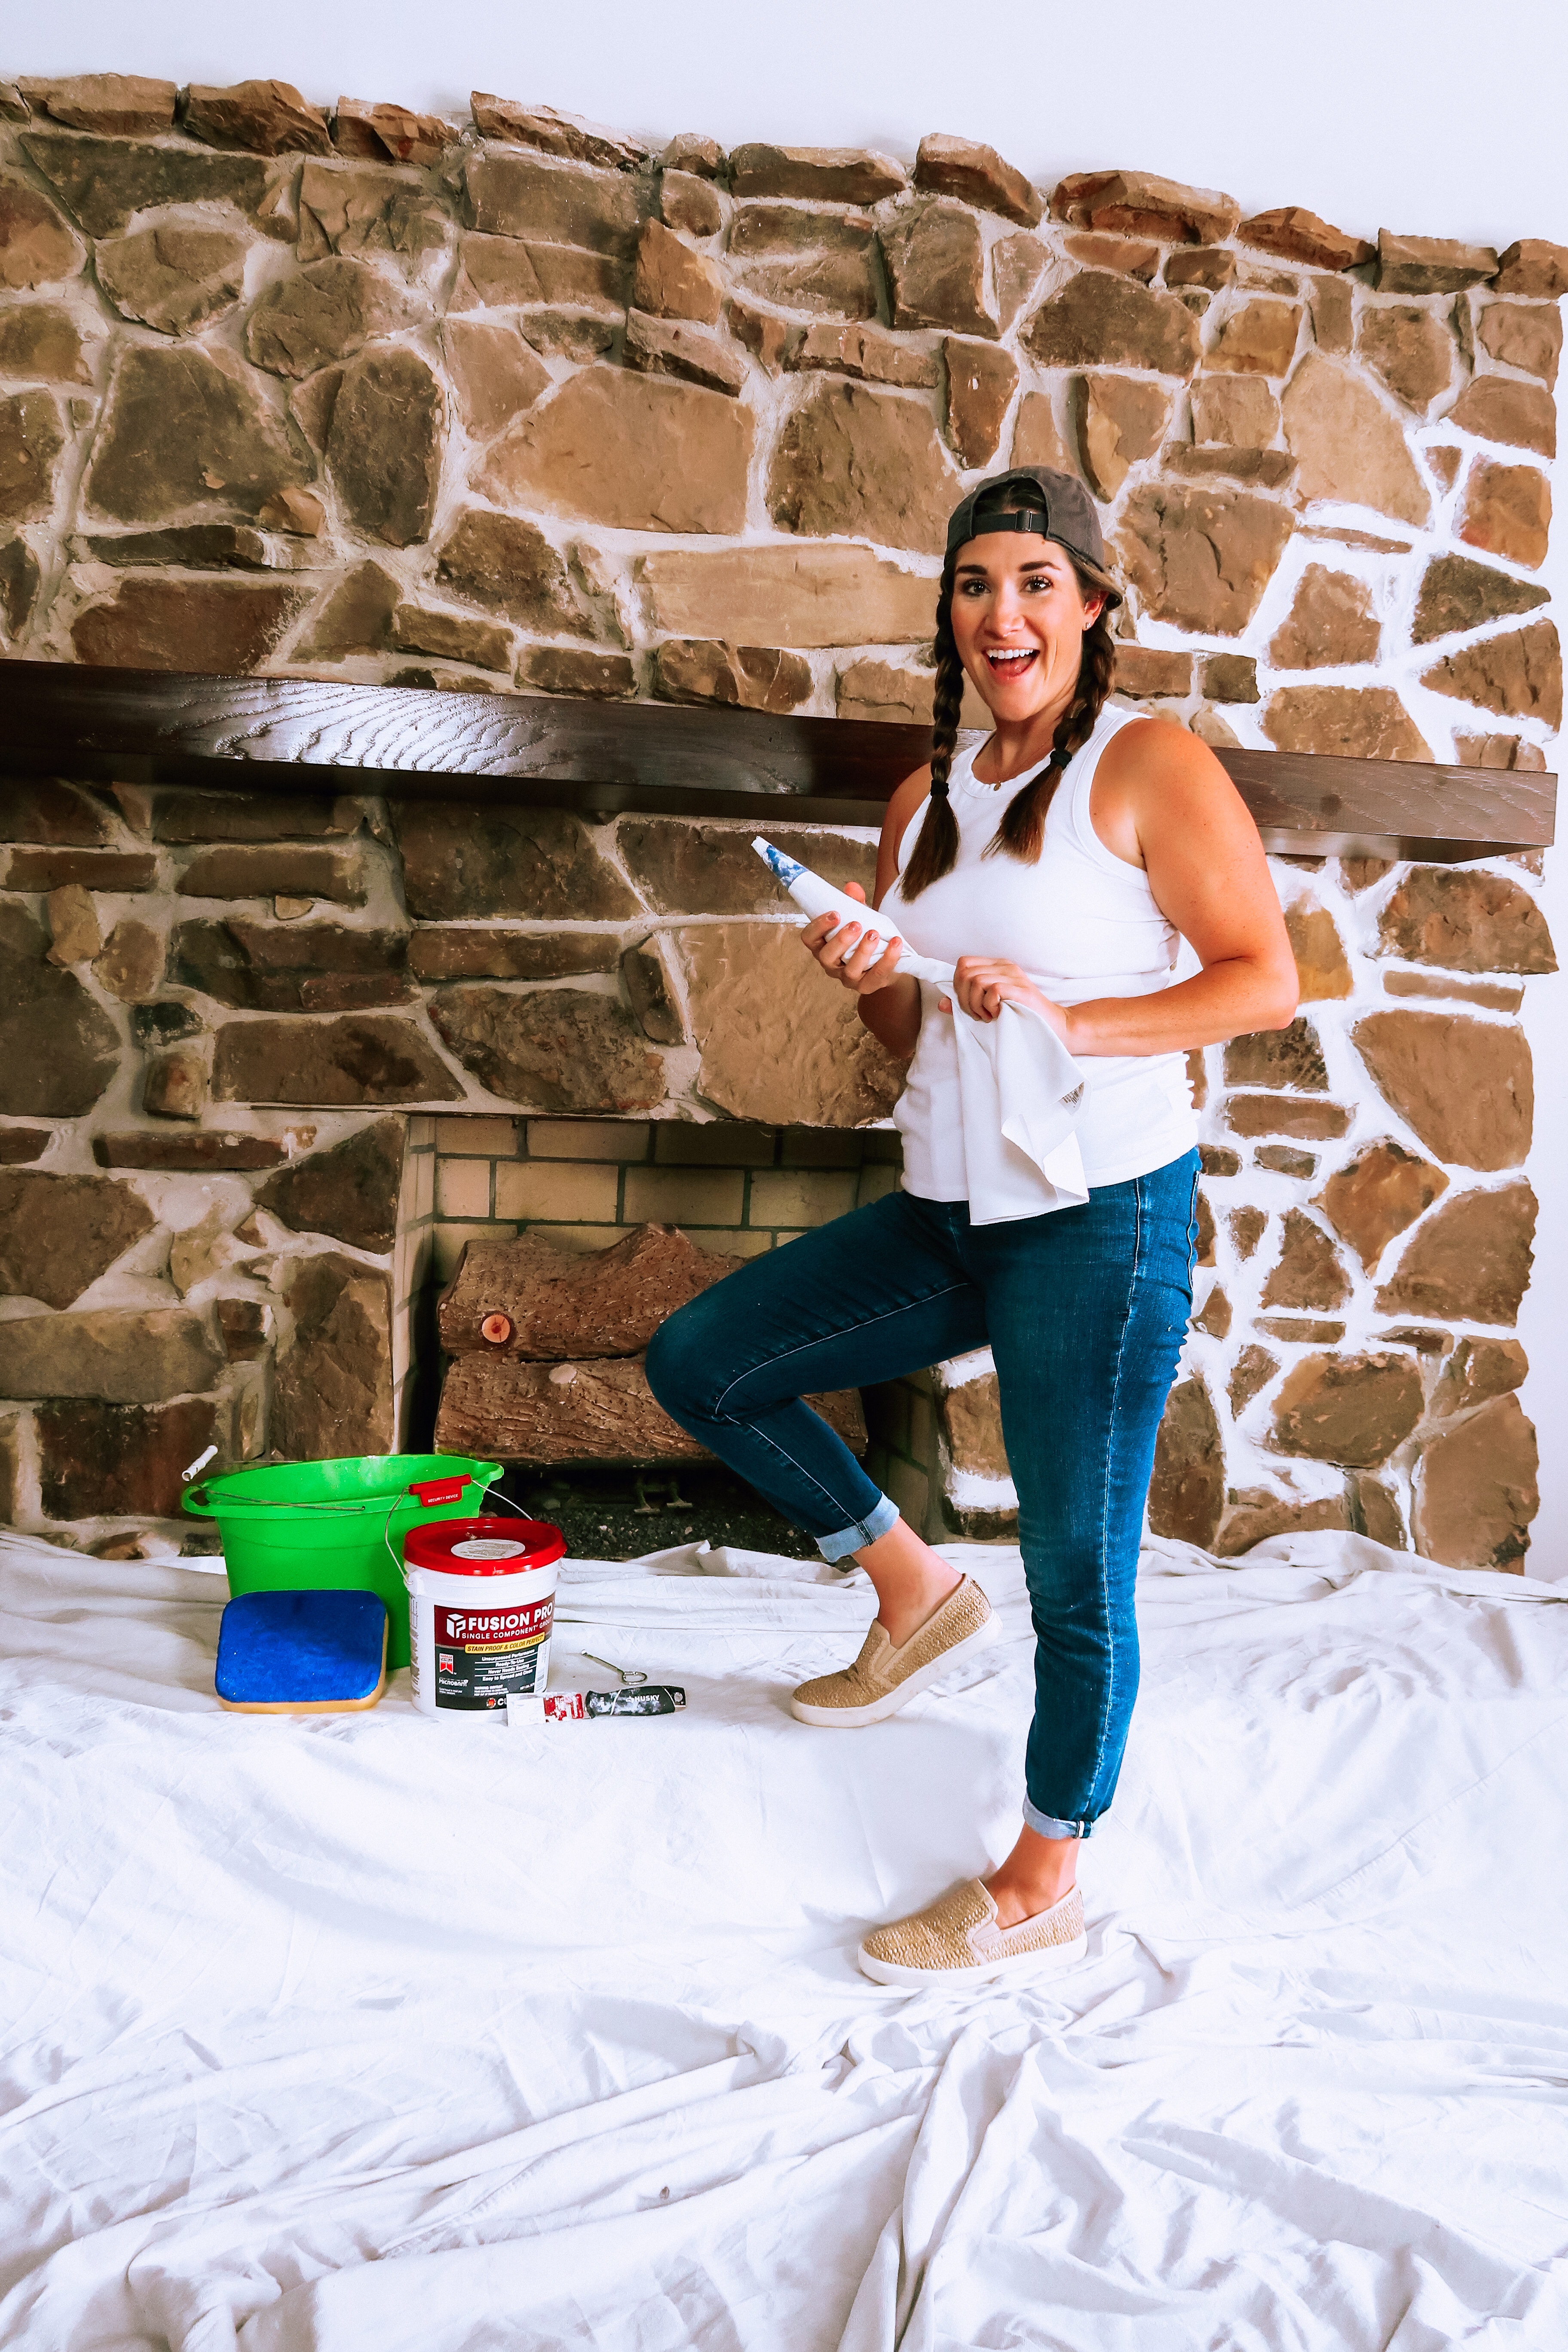
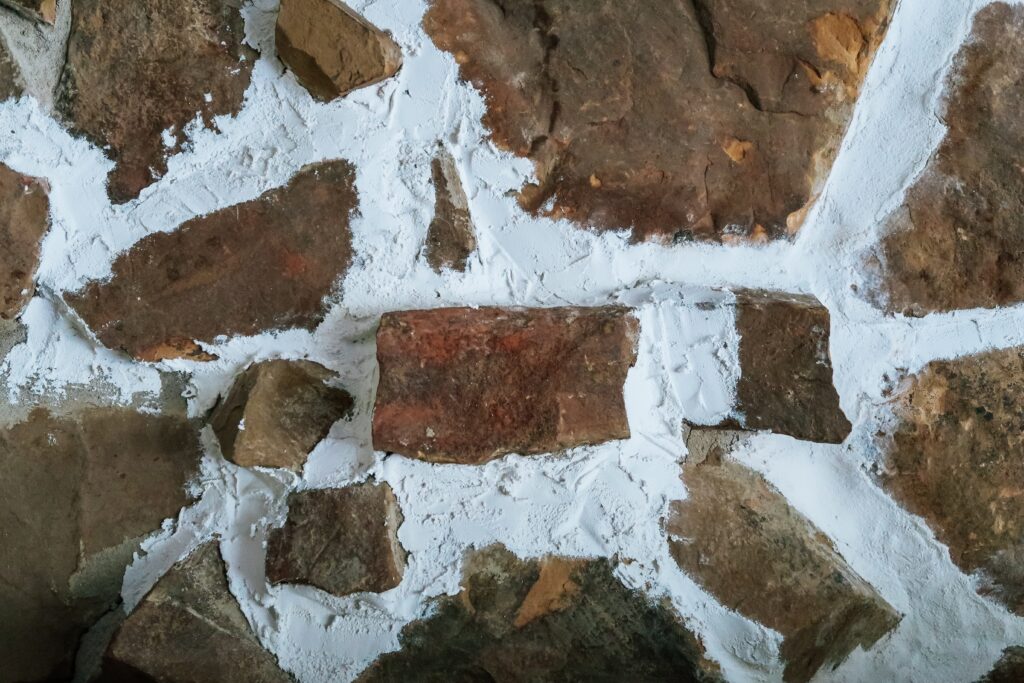
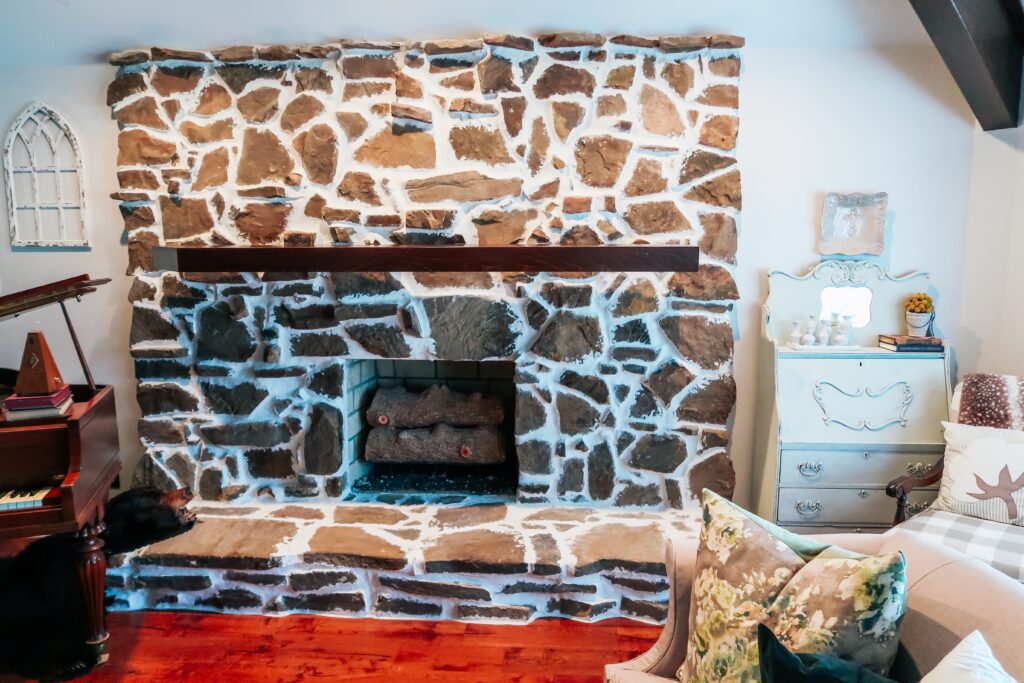
MIDWAY THROUGH THE PROJECT
Here is a close up of the fireplace about mid-way through, you can see the grout lines looking thicker and see the difference between the gray and white grout.
If you’d like to see a youTube video of a German Schmear with a limewash on a similar fireplace, you can see a great tutorial from A Girl and Her Glitter HERE.
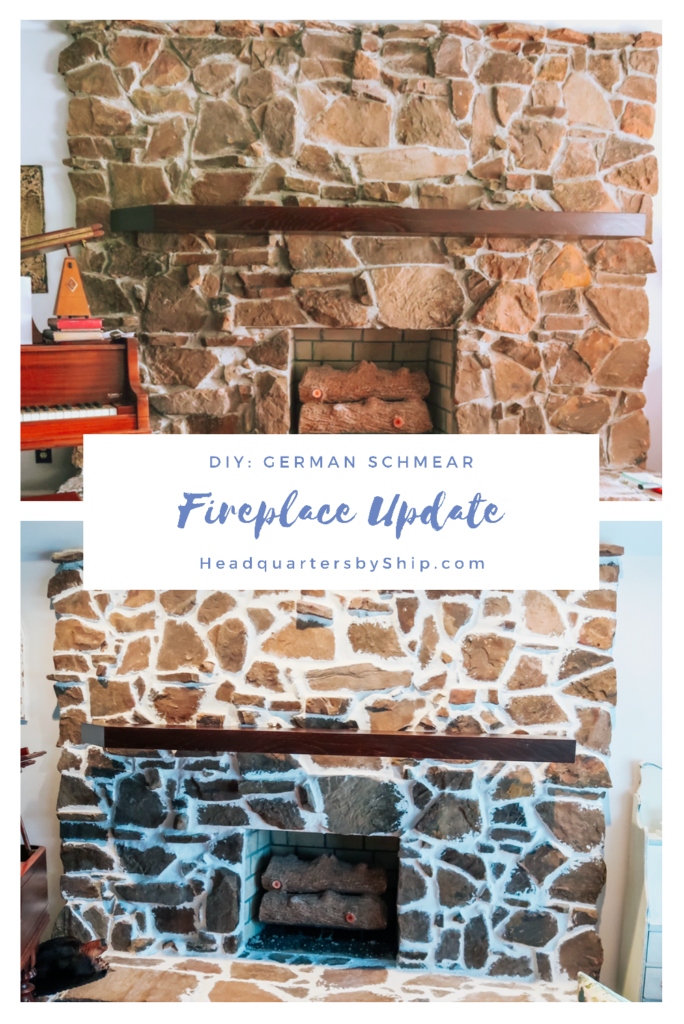
BEFORE AND AFTER
Here are some side by sides of the before and after.
-
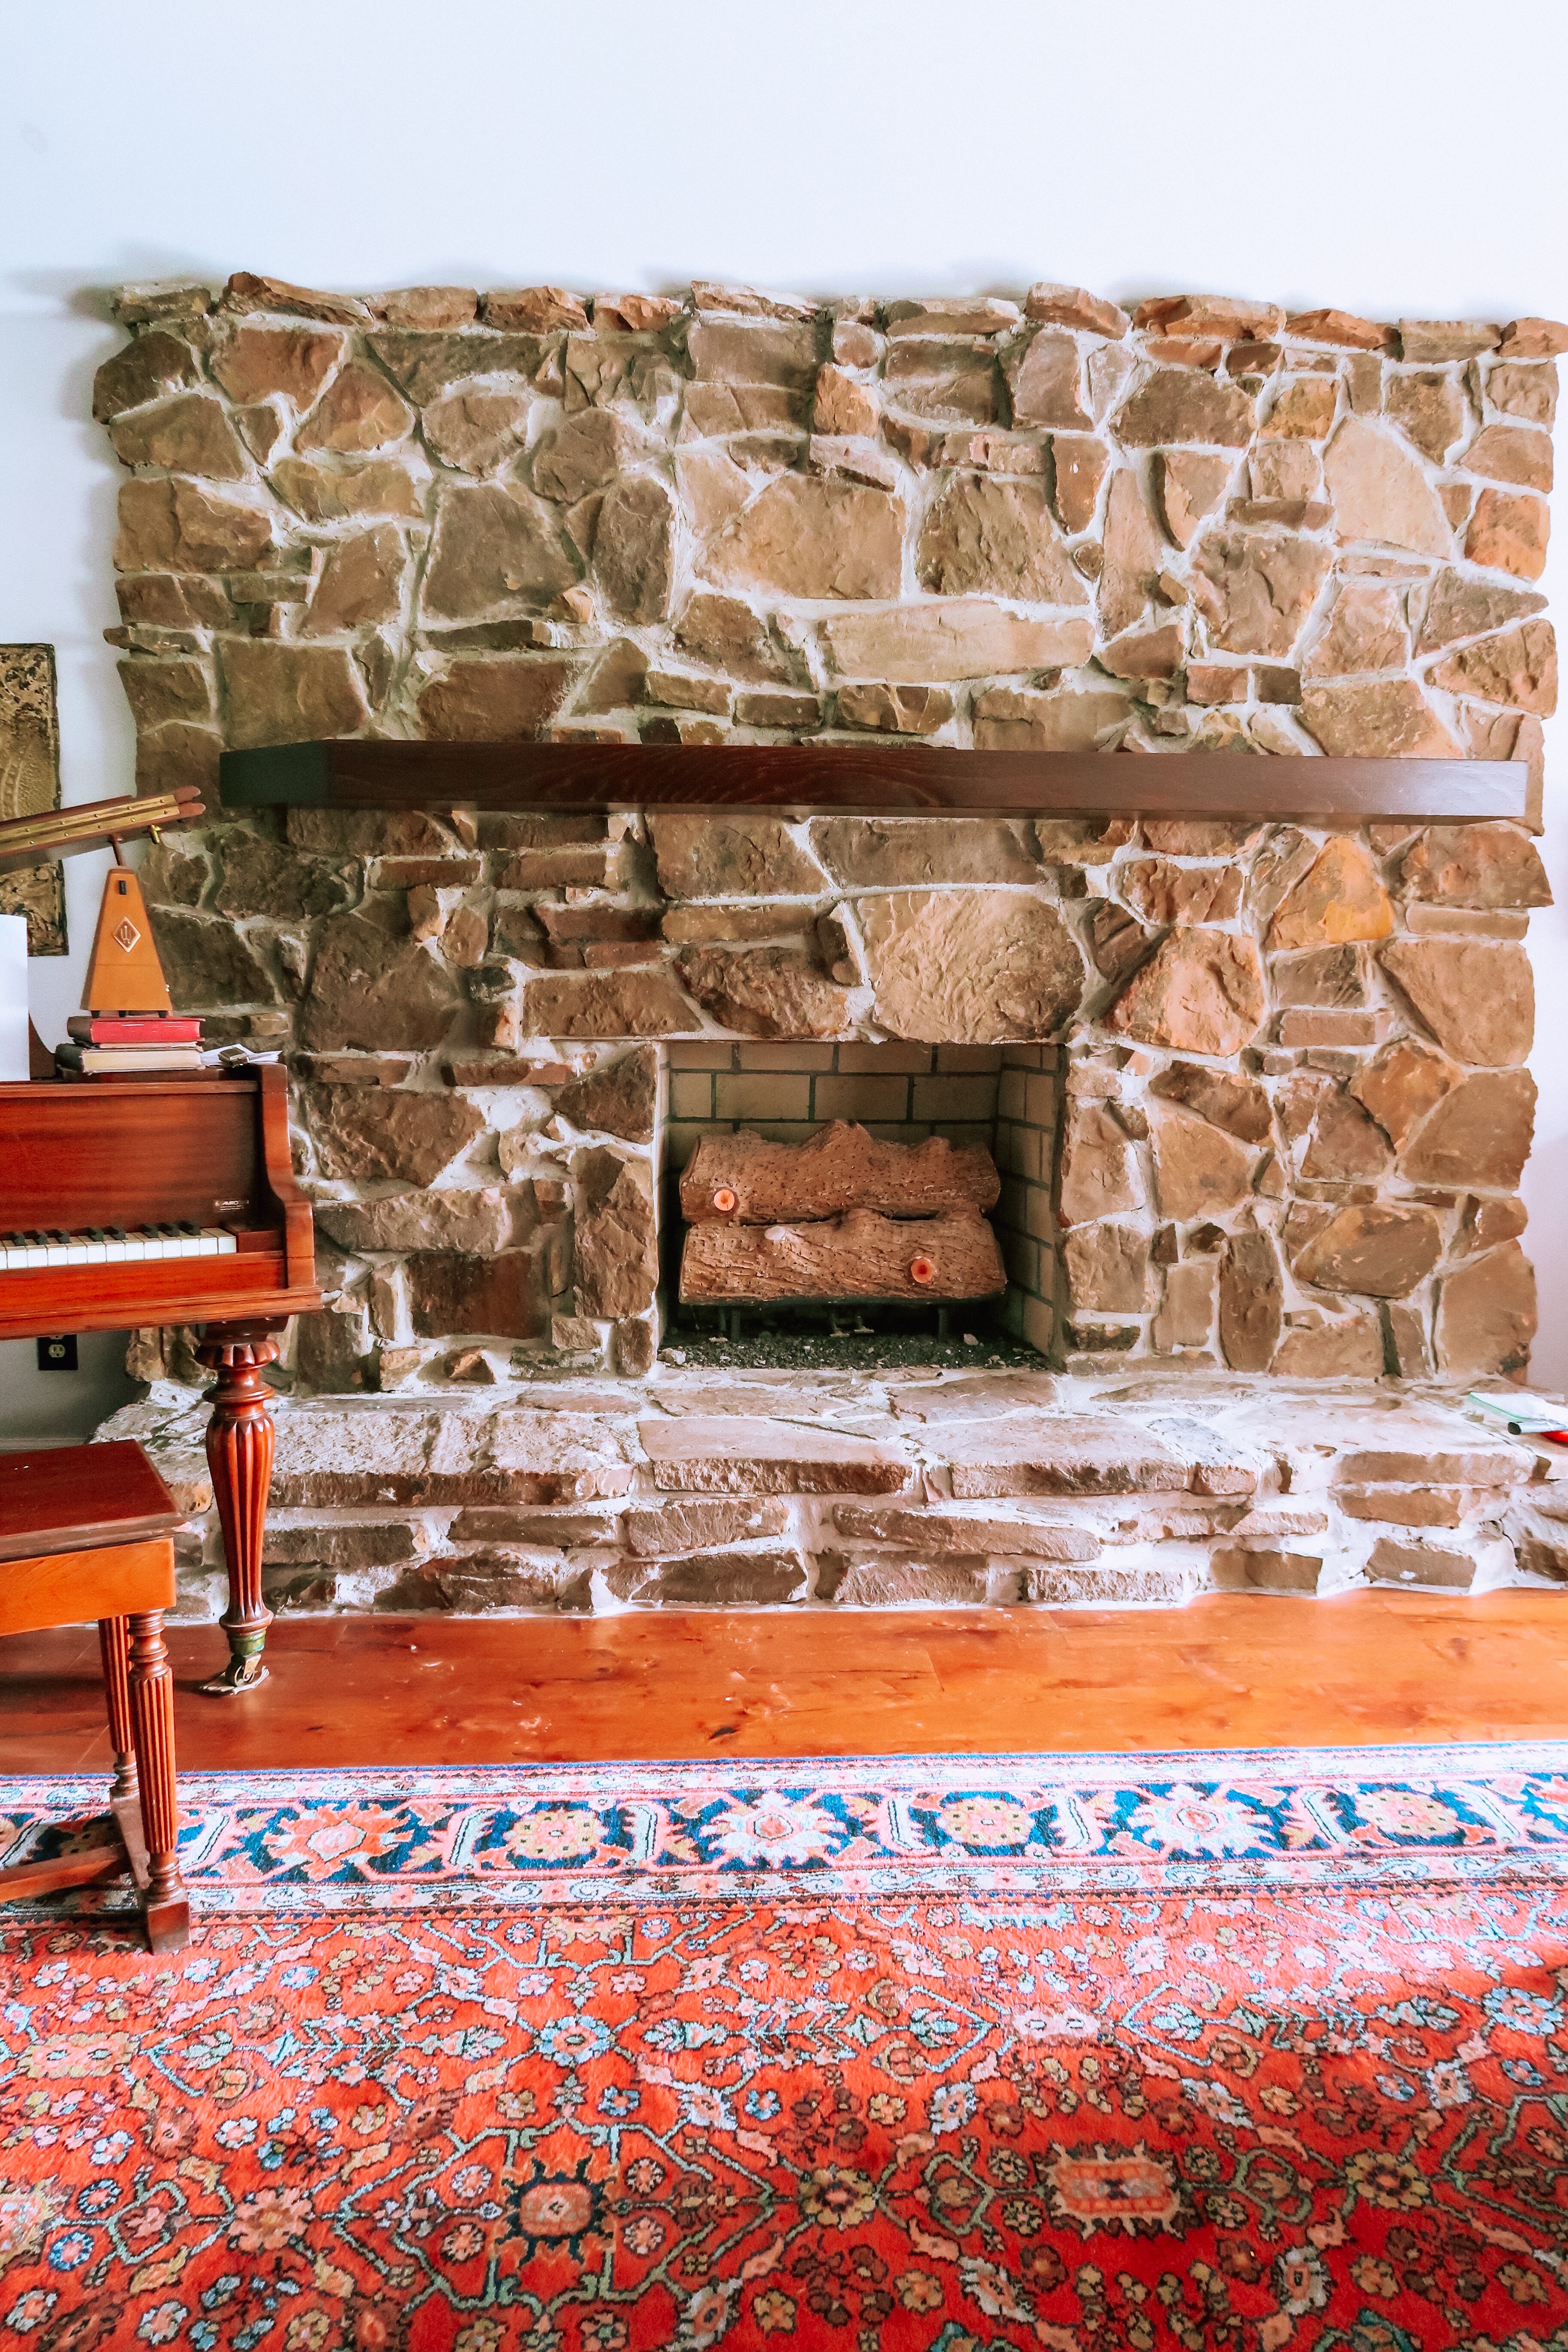
Before -
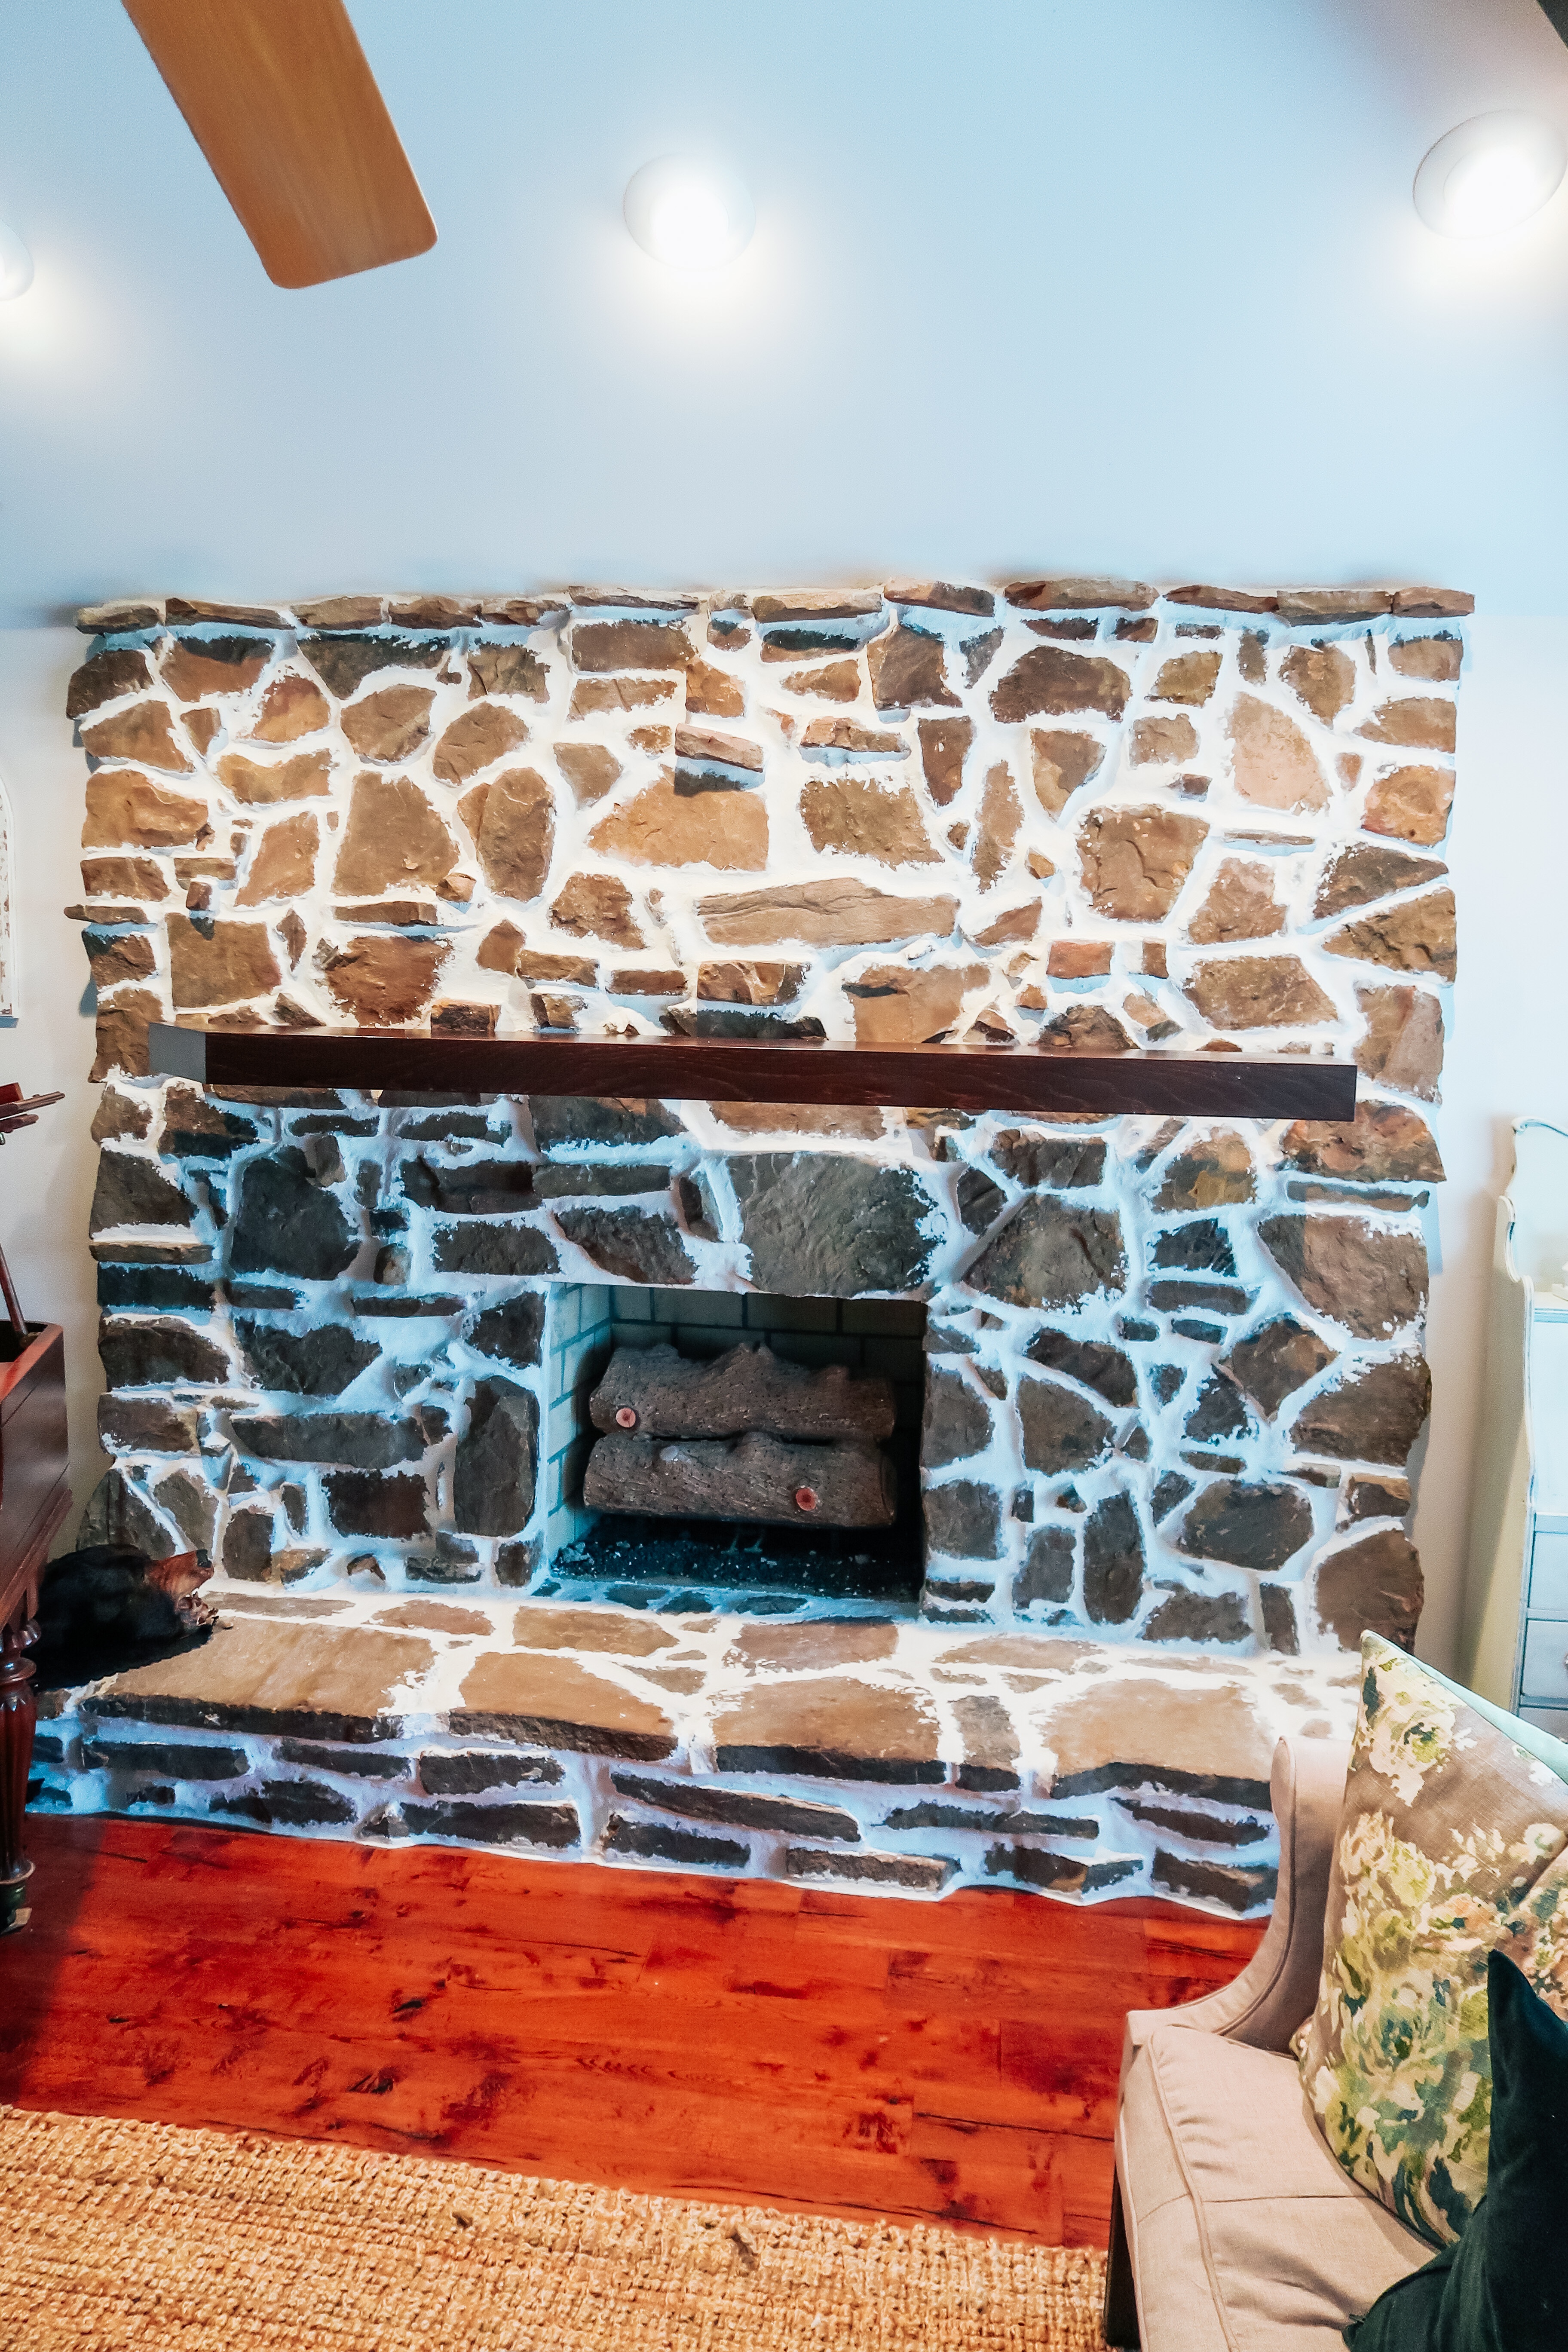
After
I really love how it turned out. The change is subtle, but I can really tell the difference in the brightness of the room. After finishing the fireplace I also decided that I needed to change up the traditional rug we had in the living room as well, so I took the jute rug out of our dining room and moved it into the living room. It is a little small for the space, but will work for now until I find the right replacement for it.
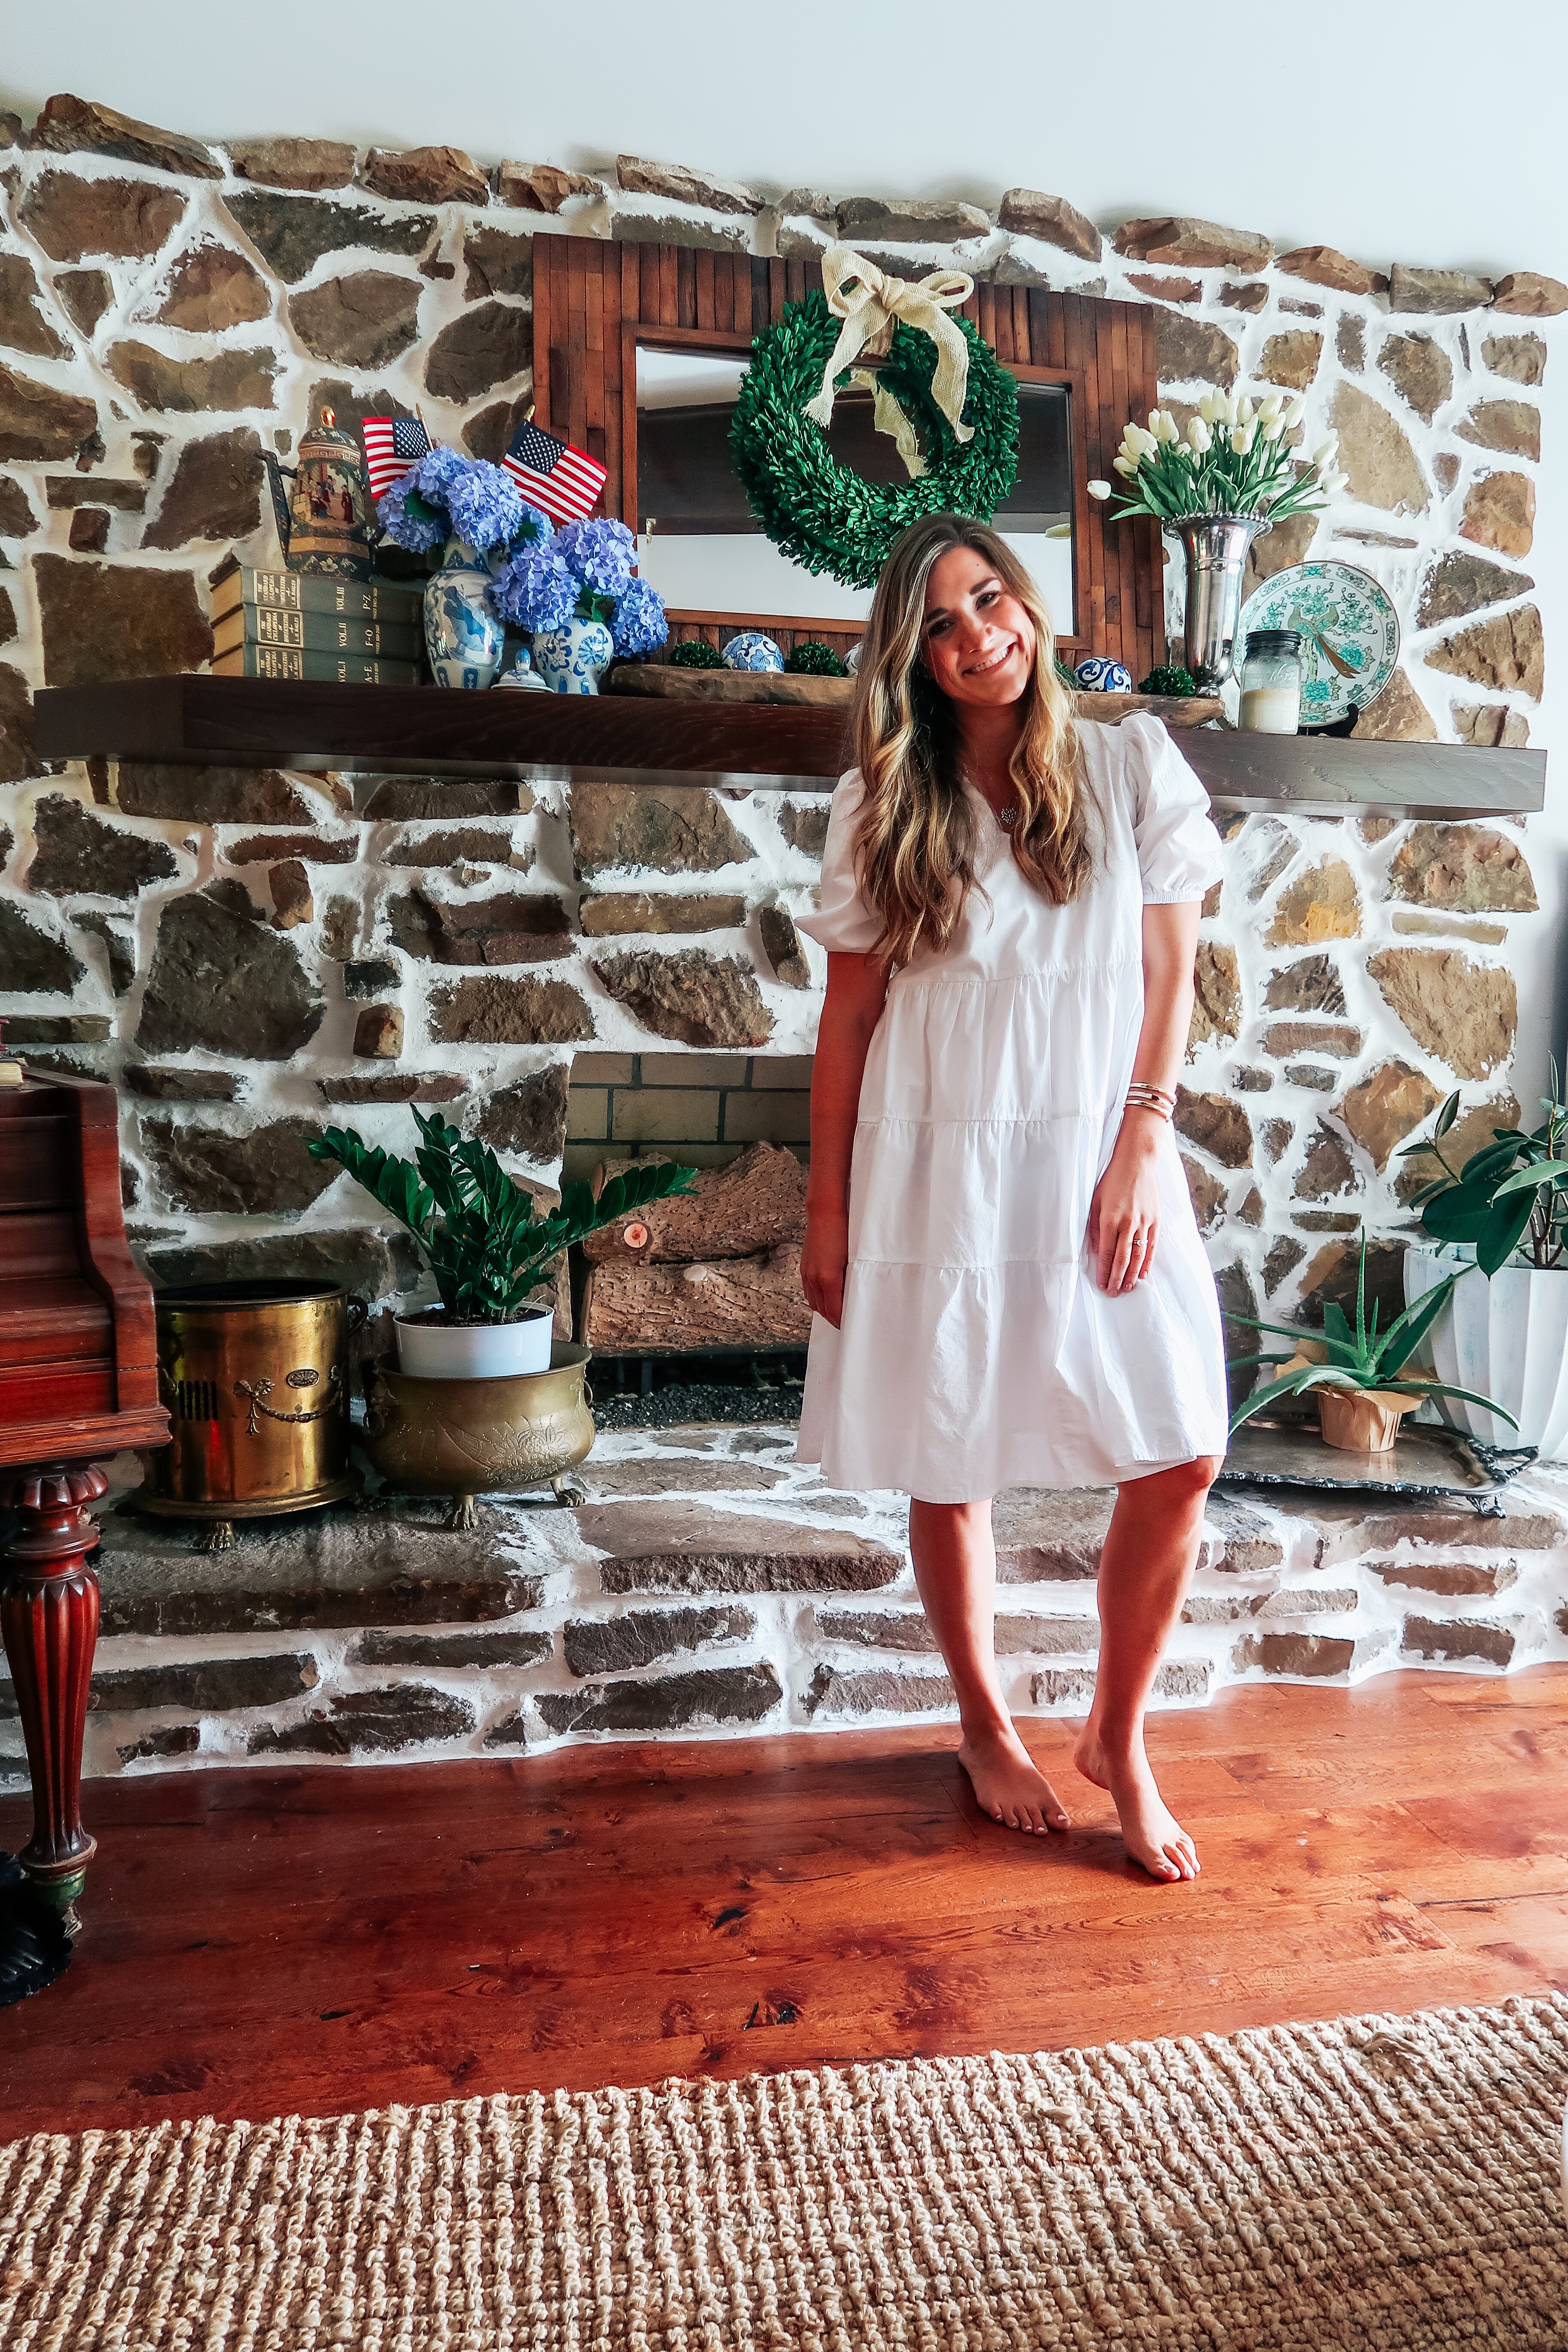
THE FINISHED PRODUCT
Here is a picture of my current mantle set up. It’s a combination of wedding gifts, things that have been handed down, unique finds from antique stores, and of course a little bit of Home Goods! I think it still needs a little bit of work, but it’s good enough for now.
I hope you enjoyed this post! Be sure to leave me a comment to let me know what you think, or if you have any questions. Your feedback means the world to me!
[show_shopthepost_widget id=”4481206″]
I will be sure to have Will watch the kids for a weekend whenever I get around to updating our other mantle, so I can update this post with a video. Subscribe to my blog and stay tuned so you don’t miss anything!
Also, if you’d like to see what I’m working on from day to day, and see what I’m currently growing in my garden, be sure to follow me on Instagram @ShipsHQ.
This blog is powered by Blue Host.


Recent Comments