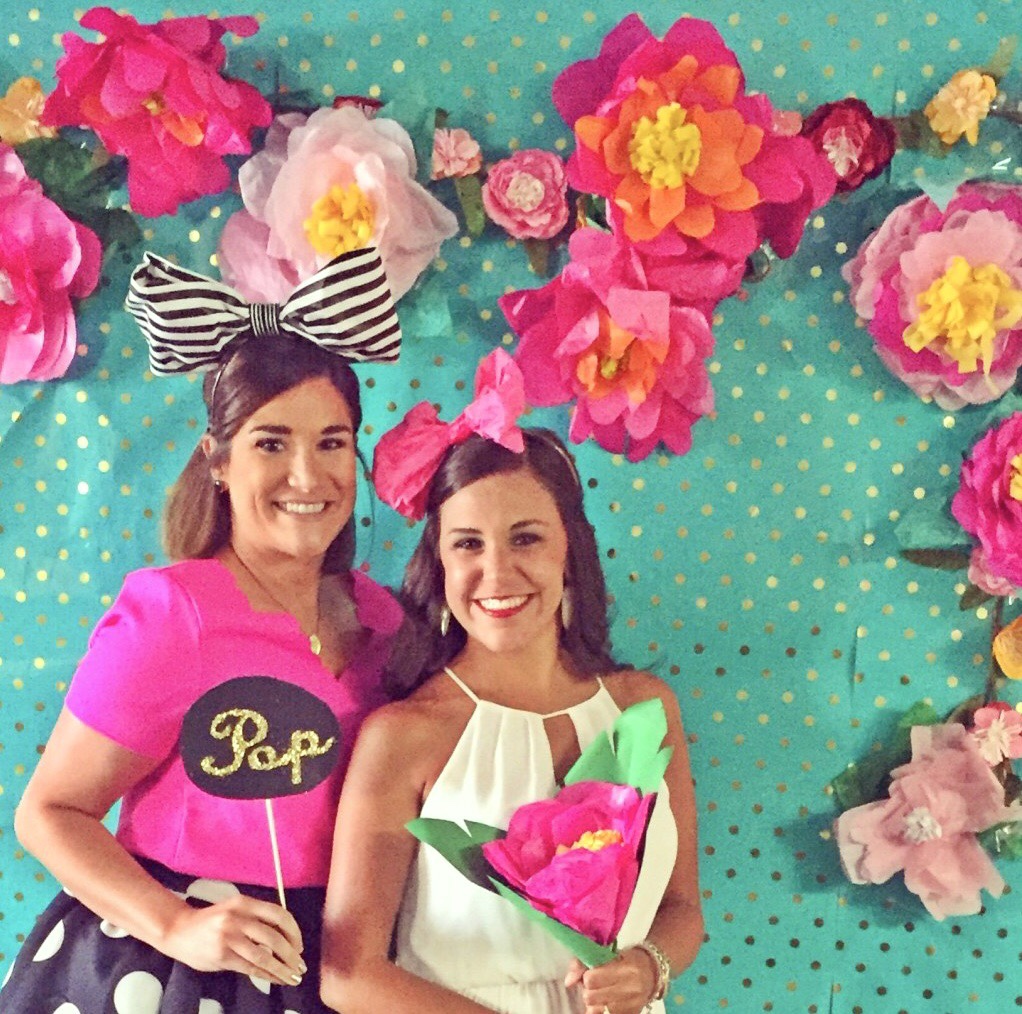
If you wanted to know how I made this floral backdrop for photo-ops during Hogan’s Bachelorette, here are some helpful links and tips:
Disclaimer: Some of the links in this post are affiliate links, meaning I may earn a small commission if you purchase something from a link provided. Headquarters by Ship appreciates your support and thanks you!
First, I found some cute wrapping paper from Home Goods that fit our theme for the occasion. Since we were in Florida for Hogan’s Bachelorette, I wanted the background to be colorful and bright, and I found the perfect paper at my local Home goods. I bought 3 rolls to be on the safe side, but I ended up only using two.
Next, to make the background bold and fun, I looked up some paper flower tutorials on Pinterest and browsed other floral backdrops for Pinspiration. Here is another link for a variety of step-by step, paper flower tutorials. To make the flowers, I bought a bunch of tissue paper, and gathered some floral wire, green fuzzy pipe cleaners, tape, scissors, and got to work!

To make the inside of the flower, I folded up some yellow tissue paper into a long rectangular shape and cut little strips into is about 2/3 of the way down. Then you roll that up around the floral wire (or some green, fuzzy pipe cleaners) and tape it together. Then you add the petals, starting with smaller ones on the inside and keep adding larger petals around the outside until you have built your flower to your desired size.
Around each layer of petals, I taped around the bottom/inside of the petals to make sure they wouldn’t fall apart after putting them together. Add some green leaves to the back for some contrast once you’re done, tape them down, and twist some floral wire around the back as well for extra stability.
Once the flower is all put together, I used a pencil to roll the ends of the flowers and curl them out to add some body and extra shape to the flowers. Keep repeating until you think you have enough flowers for the look that you want. I went for an asymmetrical cluster of flowers so I wouldn’t have to make too many.
To make the photo booth props, I used some scrapbooking paper, and my Cricut to cut out words to match our Kate Spade theme, and taped word bubbles onto some wooden skewers so the props would be easy to hold.

Here’s what you need to get started:
When you’re ready to put everything up on your wall clear, packaging Duct Tape is your best friend! Tape, tape, tape, tape, tape…and then maybe add a little extra tape for good measure.
If you have a good Netflix series to watch and a nice glass of wine to drink while you’re doing this project you will breeze through it in no time!
Leave me a comment and let us know what you think of this photo backdrop, and be sure to subscribe to Ship’s HQ so you can get all my DIY straight to your inbox!


Recent Comments